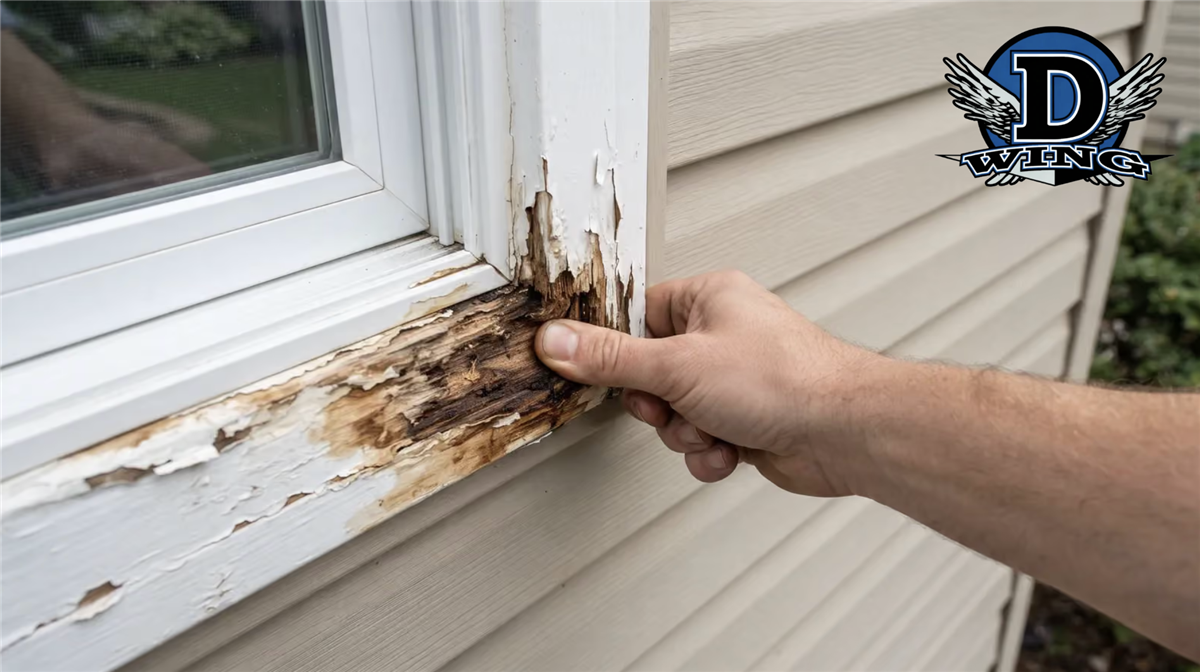
Here’s what to look for on your siding before water damage turns into a bigger, costlier repair:
Start with the Trim
Trim is the finishing boards that frame your windows, doors, and exterior corners, and it’s the first place to check. It’s thinner than most siding panels, sits at every joint and transition on the exterior, and takes direct exposure at corners, around windows, and along the base of walls, which is where moisture tends to pool.
Run your hand along the bottom edge of your window and door trim. If it feels soft, spongy, or gives under light pressure, the material has absorbed moisture and started to break down.
Also look for paint that’s bubbling or separating from the trim face. When paint blisters outward, moisture gets trapped underneath it, expanding and contracting as temperatures change. Once it starts, it accelerates because the exposed surface takes on even more water.
Trim that’s cracked along the grain, split at corners, or pulling away from the wall at the caulk line is showing the same thing.
What to Look for on the Siding Panels
Once the trim is checked, move on to the siding itself.
Bubbling or Blistering Paint
This is one of the clearest signs. It happens when moisture gets trapped between the finish coat and the substrate and can’t escape. On wood siding, this typically points to a failed caulk joint or a problem with the house wrap underneath. On fiber cement siding, it often comes down to paint adhesion issues, improper priming, or inadequate clearance between the panel and grade.
Discoloration and Staining
Look thoroughly below window sills, at the base of walls, and around any penetration through the siding. Streaks of brown, orange, or grey trailing down the panel face usually mean water is tracking from a failed joint or flashing point somewhere above.
Soft Spots
Soft spots are the most direct indicator of serious damage. Press firmly along the siding panel. If a section flexes more than the ones around it, feels spongy, or shows depression around a fastener, there’s a good chance the sheathing or framing behind it has taken on moisture.
Warping or Buckling
Warping or buckling in vinyl siding can signal moisture intrusion, though it can also result from improper installation or heat exposure. If it shows up alongside other signs, treat it as a moisture indicator until you can rule it out.
Signs to Check For Inside
Two things to check inside your home:
1. Water Stains on Interior Walls
Stains near exterior-facing surfaces, especially below a window or along a corner, mean water has already moved through the wall assembly.
2. A Musty Smell
A musty smell near an exterior wall often means moisture has been sitting in the wall cavity long enough to grow mold. By that point, it’s typically past the scope of a caulk repair.
Most of the siding calls we get at D-Wing come from homeowners who noticed something small inside and weren’t sure if it was related to the exterior. It usually is.
How Water Gets Into Siding
The majority of siding water damage traces back to a handful of failure points.
Caulk Failure
Every window, door, hose bib, electrical box, and light fixture is held by caulk where the siding meets it. Exterior caulk has a finite service life, and the freeze-thaw cycles Aurora sees every winter accelerate that process. Once it shrinks and cracks, water follows the gap.
Flashing Failures
Flashing is the metal barrier installed at openings to redirect water away from the framing. When it’s incorrectly installed or starts to fail, water tracks into the wall cavity rather than shedding off the surface.
Clearance Issues at Grade
Siding that terminates too close to the ground, mulch, or other horizontal surfaces doesn’t have enough room to drain. Fiber cement siding products require a minimum clearance above the soil line. When soil settles or landscaping changes close that gap, the panel absorbs moisture from below.
Old Penetrations and Patches
Holes from prior hardware, old satellite dish mounts, or previous repair work that wasn’t properly sealed are common entry points, especially on homes that are ten or more years old.
Repair or Replace?
What you find on the inspection determines how much work is involved.
Surface paint failure and minor caulk damage point to early-stage intrusion that a targeted repair can handle. Recaulk the joint, prime and repaint the affected area, and the problem is solved.
Soft panels, significant warping, or any moisture showing up inside the house means you’re past a surface fix. The sheathing behind the siding may already be compromised, and replacing the panels without addressing that is a temporary solution at best.
If damage is showing up in multiple spots, or the siding is aging and approaching the end of its serviceable life, it’s worth pricing out replacement alongside the repair. Here’s a breakdown of what goes into the decision to replace siding, and how to tell when repair stops making sense.
If the water damage followed storm activity, the pattern tends to be more concentrated and may open up an insurance claim. D-Wing has a full walkthrough on what storm damage does to siding and what your options look like from there.
When you find something and aren’t sure how serious it is, getting eyes on it from a ladder is the fastest way to know. D-Wing offers free estimates across Aurora and the Fox Valley. We’ll tell you exactly what’s there, how far it goes, and what it costs to fix before you commit to anything.
📞 (630) 556-8099 | Schedule at dwingconstruction.com/siding/
Tags
Subscribe to D-Wing Windows, Siding & Roofing's Blog






Comments